Making a (Very) Simple Form With HTML and CSS

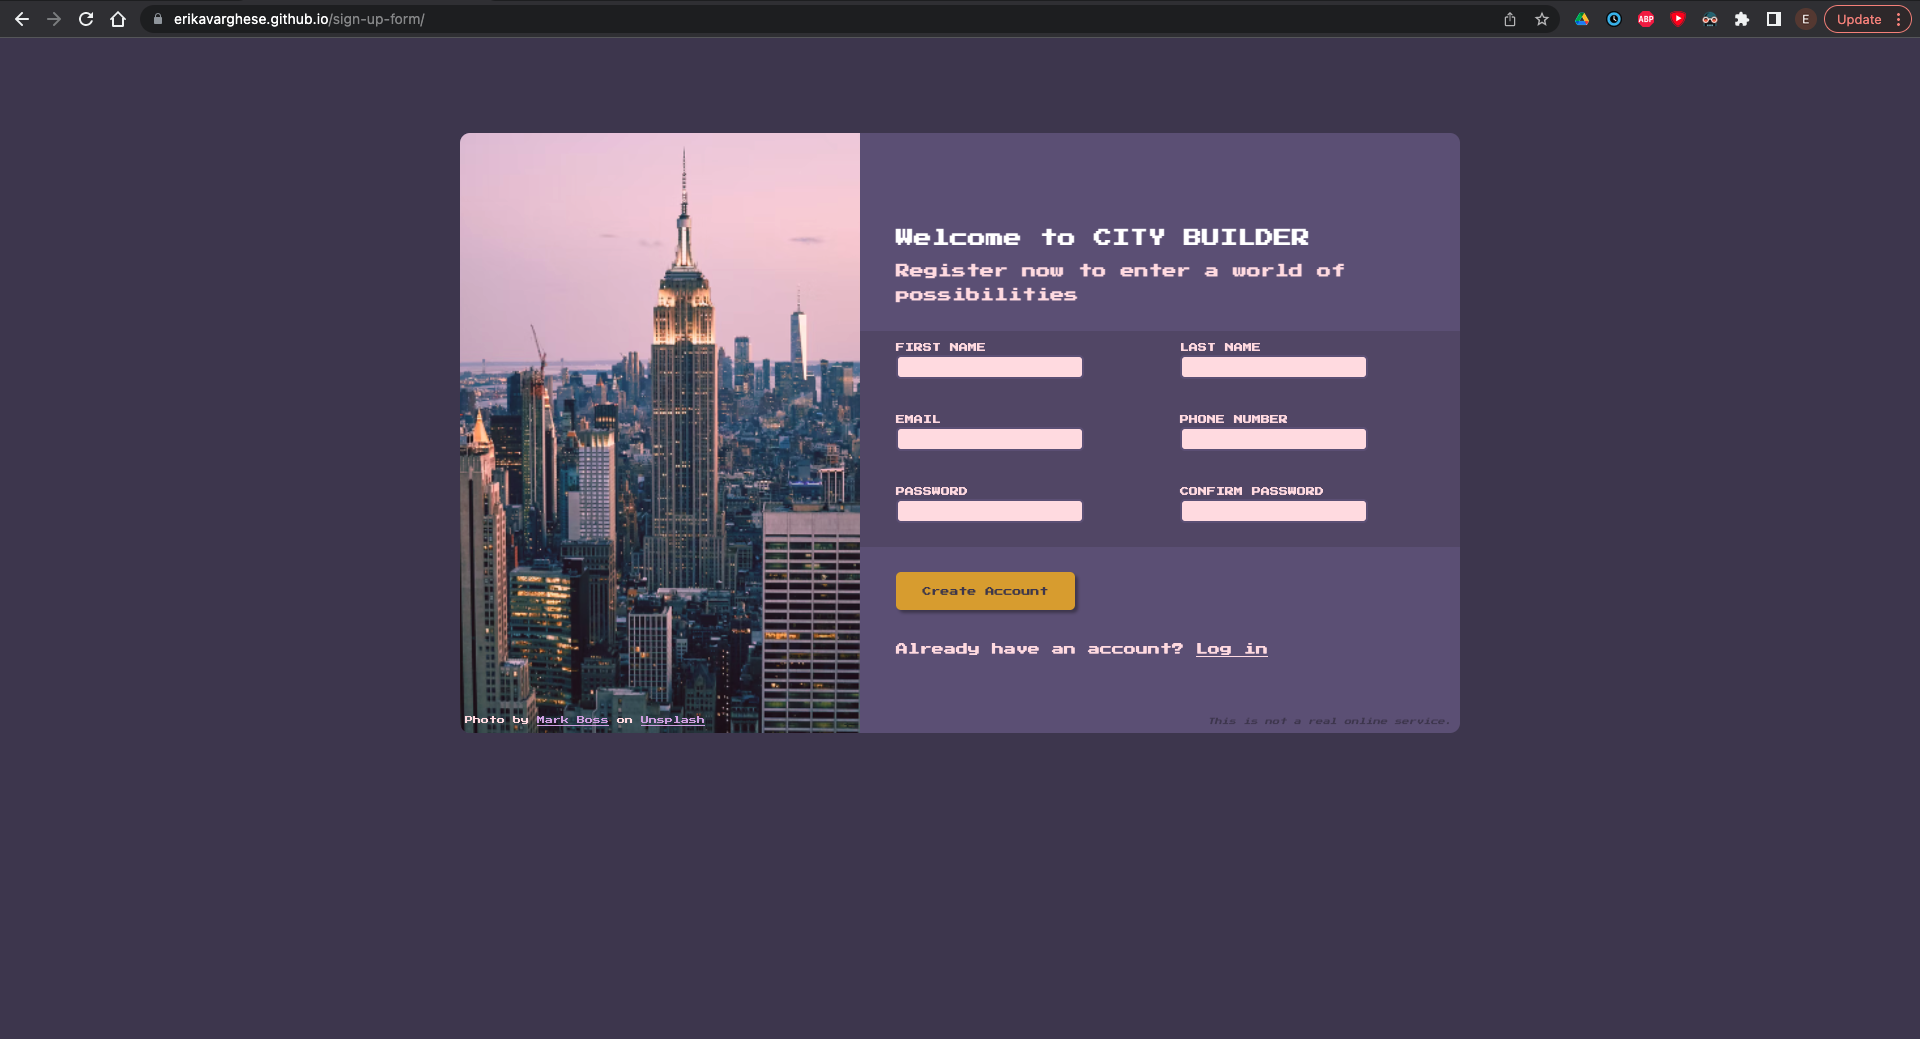
A couple of days ago, I put together my first form using HTML/CSS. Here's how it ended up looking:
I had 3 things I wanted to focus on (and get better at) with this little project:
- Form controls
- Client-side validation
- Positioning and styling (i.e. trying to make it look nice 😀 )
Here are a few key notes I picked up for each of these.
Form controls
After deciding how I wanted everything to look and choosing my fonts and images, I added the form controls to my HTML file. Basically just <input> and <label>, since I didn't want to do anything too fancy. I put each input and its associated label into its own div.
<div>
 <label for="fname">FIRST NAME</label>
 <input id="fname" type="text" required>
</div>
Result:

What's that for?
The for attribute in the label associates it with the input field that has an id of the same name. One result of this is that if you click the label, the associated input gets selected in the same way it would if you just clicked the input itself.
Client-side validation
Making inputs required
Client-side validation is what happens when you set rules for the type of input that gets accepted.
As you may have noticed, I added the required attribute to my first name input. I added it to all the other inputs in my form as well. Here's what happens when you try to submit the form with a blank input:
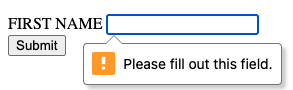
This lets the user know that filling this input is required. Pretty simple.
Restricting input length and pattern
Things got a little more interesting with the telephone number input. Here's what the code for this part looks like:
<div>
  <label for="num">PHONE NUMBER</label>
  <input id="num" type="tel" minlength="10"
      maxlength="10" pattern="[0-9]{10}"
      title="Enter a 10-digit phone number without hyphens or
      parentheses, example: 1231231234" required>
</div>
A few things going on here.
minlengthandmaxlengthrepresent the minimum and maximum number of characters an input can have respectively - since I wanted to restrict to exactly 10 digits, I included both attributespatternuses regex (i.e. regular expression) to specify the desired input pattern -[0-9]{10}just means 10 digits between 0 and 9titleallows you to add error text - the automatically generated error text just tells the user that they used the wrong format, which is not very helpful, so the customizable error text is a way to be more specific. You can see that it appears right under the automatic text:

Positioning and styling
I'm still getting the hang of positioning. My strategy was:
- Create different container divs. One main container (image + form section), one container for the image on the left, and one container for the form part on the right. The
formelement itself acted as its own container for styling purposes (wanted to give it a darker background than the rest of the form container) - Make all containers have
position: relative - Use absolute positioning to adjust any elements that didn't look right within their containers
One issue I ran into was that, as I mentioned, I wanted to give the form element a darker background colour, and have the button outside this darker section. So I put the button outside the form element. This was obviously a problem, as the button needs to be within the form for it to work.
What I ended up doing to fix this was to add a <span> container around the button and to use its class to style the button.
.btncontainer {
    position: absolute;
    background-color: rgb(101, 90, 129);
    left: 0px;
    bottom: -7.25rem;
}
As you can see, this is one of the instances I had to use absolute positioning. Before I did, only part of the button was the right colour.
The final product
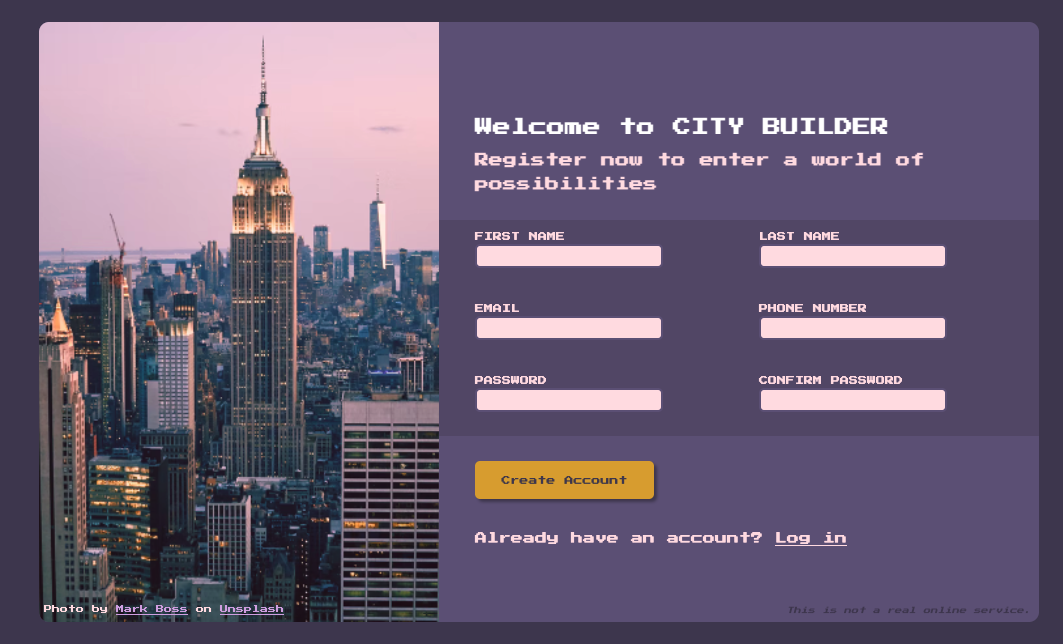
I'm happy with the result. Looking forward to my next project.
The code is on github: https://github.com/erikavar/sign-up-form
I had a lot of fun writing this (my first post!), so thanks for reading. Any feedback on my code or my writing is appreciated!
Until next time,
Erika
